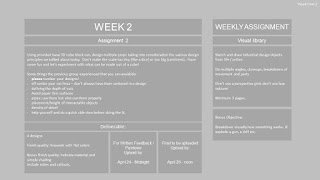
LOL sorry I had the first time did the courses page up - here's the real one:
Photoshop base file:
https://1drv.ms/u/s!AndYs2EuYyM7kcEbh_flv5o1dQlSAQ?e=wwEBlt
Examples from the last group - i'll start with the NOs:
Now for the YES ones:
_________________________________________________________________
Example 1:
Good job this week. I think you've got a decent start on these with your basic forms - now it'll only be a matter of clarifying their internal shapes and bringing in the details to spice it up. I think the paintover covers most of the things I was thinking of. If you're finding you're having a hard time coming up with details or shapes for cut lines you can always reference mechanical or environment sketches that have already been done or just gather some reference material you think has some great information in it. Here's some quick things I was thinking about/adding in as I was painting over the design:
- Shape definition but not over describing forms and connecting too many lines - leaving some gaps in the lineart
- Using simple material indication: multiple surface coloring/material/shading and simple glass
- Carving into the various forms of the base and popping out others to create areas of interest and implied assembly.
- Lots of little details and filler noise like screws, implied base, repeating patterns, interesting areas of focus/detail but not overdoing it and leaving some areas for visual rest.
- Added/cleaned up interactable details like handles
- Defined what was going on behind some of the glass.
Paintover:
Good start on these, I would recommend trying some more interesting shapes if possible kind of like what you're doing with the phase 2 of the first cylindrical image. If possible you could break up the interior into multiple forms rather than either one massive shape (cylinder, triangle, square). Here's some other notes in relation to the various sketches:
- You don't always have to show a beveled edge with 2 lines. Often times you can do this with your shading and just have an edge rim light catching some extra light making it pop.
- Sometimes you're forgetting to depict bevels on far sides (will point out in class)
- The front of your GPS tracker could use some more interesting breakup as most of the forms seem to be just cut into the surface and never connect or touch and edge. Remember what I said about having these forms help define the form of an object. Alternatively since its so tiny, you might want to increase the size of some of these objects as it could easily be mistaken for the size of a satellite.
- There's a lot of weirdness happening in the pin area of the frag grenade especially around how the pin attaches to the device: its holding ring is super tiny and looks squished. This design will need further details to help sell it as how the larger beveled edges intersect feels too razor sharp/geometric - remove some lines so these blend nicer.
- For the weapons storage locker, remember what we talked about with plane transitions last class - slightly round out some of those edges and erase some of the lines so it feels less like a 3D wire frame.
- Have some more interesting forms in the sides and variation in the outside frame would be nice as it’s the same all the way around.
- Don't vary the angles of things too much - choose 1-2 and repeat them throughout the design/echo them.
- More fun little details that suggest how its constructed!
- A defined bottom and area separated areas with materials.
- Sketches for the week look good - be sure to turn to rotate some of these objects around and see what they look like from multiple angles.
Paintover:
_____________________________________________________________________
And now onto some links for boxcutter/hardops tutorials!
Ponte Ryuurui has a good one here. He covers ALOT in 30 minutes so I'd recommend taking notes and bringing questions for next class if you end up having any!
Josh Gambrell has a couple of detailed ones for both HardOps and Boxcutter you can follow along with:
Now for the tutorials where you can get turned up to 'Beast Mode' by the creator of hardops and boxcutter. Be warned he speaks kinda fast and will sometimes move quickly but he'll give you a good rundown on how to build the cylinoid - we'll be doing a 'slightly' less insane version of this in next weeks tutorial - i'd recommend giving it a go so you can see if there's any issues/problems you come across you can ask about in class:
If you've got a ton of time - he goes through EVERYTHING here. this is the monster. EVERY. SINGLE THING. COVERED. its almost a year old some some tools have changed but it'll still explain pretty much everything. Give it a watch (at least the first few) and bring questions. I want you guys to feel comfortable asking me anything about this - if you don't understand a term or something don't be afraid to let me know and i can try to explain it.

Just go into your add ons and activate 'Modifier Tools' and it should appear - i'd say its great for applying all your modifiers when you need to! I'll create a 'proper' package to download this week with the addons and starter file as I've spoken to my blender master coworker and he's given me some tips on how to get it done - stay tuned.


No comments:
Post a Comment